

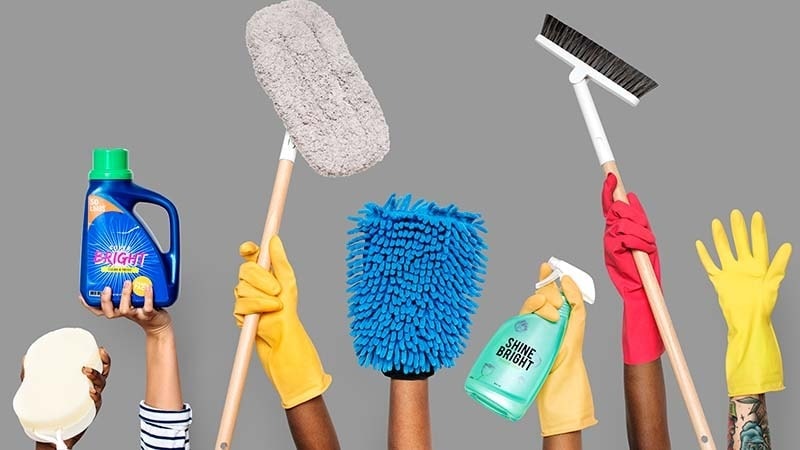
Cotton mops are great for cleaning floors, but can harbor bacteria and foul odors. Proper cleaning will remove dirt and debris, while disinfection will kill all odor-causing germs. Knowing the difference helps keep your place hygienic and extends the life of your cotton mop.
In this article, we share simple and easy steps for cleaning, disinfecting, and maintaining your cotton mops.
Guide to Deep Cleaning Cotton Mop Heads
Here is a quick step-by-step guide to cleaning cotton mop heads.
Step 0: Gather Materials Needed
Here is a quick list of all the materials you will need to clean your cotton mops thoroughly.
- Mop Bucket (Or any other gallon bucket)
- Hot Water (Enough to fill half of the bucket)
- Mild Detergent (You can also use a dish soap)
- Second Rinse Bucket (Or reuse the first one)
- Microfiber Cloth or Towel (For cleaning & wiping the mop handles)
- Disinfectant (Bleach, vinegar, or other disinfectant)
- Spray Bottle (To hold the disinfectant solution)
- Rubber Gloves (Optional but helpful)
Depending on your cleaning requirements (regular or heavy-duty cleaning), you may need some or all of these materials.
Step 1: Pre-Cleaning
Your first step should be to remove all loose dirt and hair from your mop. Give your cotton mop a good shake to get rid of the dust and dirt. Then pick away at little hairs and other debris stuck to the mop. You can do this by hand, but using rubber gloves will keep your hands clean.
Step 2: Rinse in Warm Water
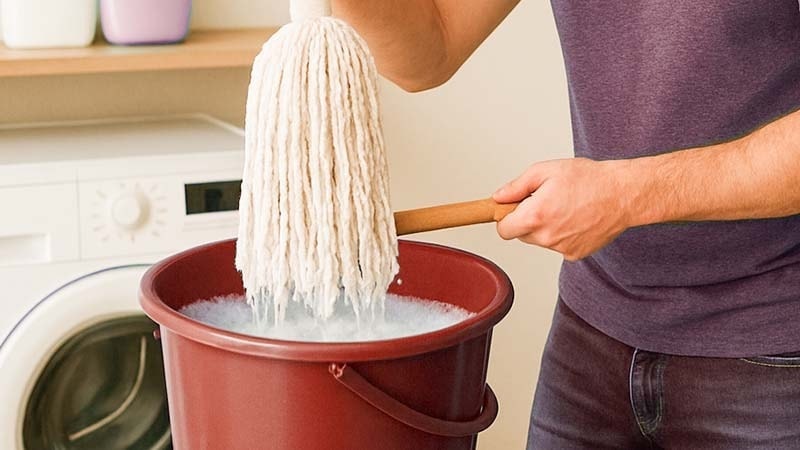
Fill your mop bucket with clean water. Hot water helps loosen the fibers, but you can also use lukewarm water. Now dip your mop head into the bucket and move it up and down. Do this until most of the dirt leaves the cotton mop.
For those extra dirty mops, you will need to change the water and repeat the steps. Try to get as much dirt out in this step.
Step 3: Disassemble the Mop
Some mop designs come with removable mop heads. Disassemble your mop based on the manufacturer’s guidelines. But separating the mop head from the handle, we can clean both parts separately, which is more convenient.
If your mop has a fixed head design, then skip this step.
Step 4a: Machine or Hand Wash
You should wash your mop heads by hand if the following statements apply to your situation.
- Non-removable mop heads.
- The mop head has a rigid metal frame. (This can damage a washing machine.)
- You don’t have a mesh laundry bag. (It ensures your loop-end and cut-end mops don’t get tangled during machine wash.
In comparison, microfiber mop heads, sponge mop heads, and other all-plastic mop heads are machine safe. You can either save money by hand washing or save time by machine washing. The choice is yours.
Step 4b: Wash by Hand
Half fill the bucket with hot water and pour two tablespoons of soap. Now dip your mop head in and clean it thoroughly. You can scrub the mop head by hand or with a soft brush. Alternatively, you can let gravity do the work for you. Move the mop around in the bucket and shake it until the dirt sinks to the bottom.
Leave the mop head sitting in the cleaning solution for 5-10 minutes. Remember, don’t use any harsh chemicals or fabric softeners. Repeat the steps until the water runs clear.
Step 4c: Use a Washing Machine
Throw your mop head into a washing machine with mild soap. A gentle wash cycle will keep your mop heads clean without damaging the sensitive cotton fibers. Hot water removes stains, dirt, and grime more easily. So wash at a high heat if possible.
We have already mentioned this, but you should definitely use a laundry bag for your mop heads. Unless a manufacturer says otherwise.
Step 5: Rinse to Remove Detergent
Now it’s time to rinse your mop head again to remove all that soap residue. This step is more important if you hand-wash your mops. First, try to wring out as much water (soapy) as you can by hand, then rinse in a bucket of clean water.
You can use multiple buckets to make the process easier. Otherwise, you will need to empty, then clean, and then refill the bucket, which can be tedious.
Step 6: Air Dry Your Mop
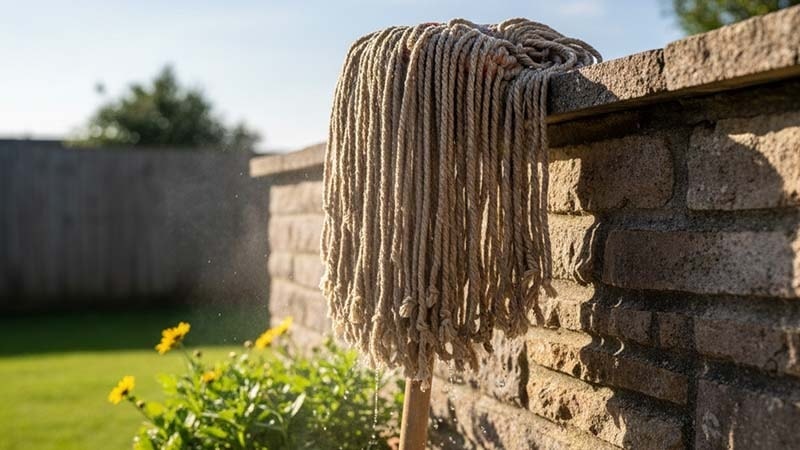
Let your wet mops air dry completely before storing. A damp mop is a breeding ground for mold and bacteria. Ideally, you should leave your mop heads hanging from a drying rack overnight and in a well-ventilated area.
However, if you have space concerns, you can leave them outside to drain the excess water. For machine-washed mop heads, you can use a tumble dryer on a low or zero heat setting.
Step 7: Wipe Mop Handle
Spray the disinfection solution onto a microfiber (or cotton) towel and wipe the handle from top to bottom. Avoid damaging the handle with abrasive pads and sponges. You are mostly trying to remove grease and dirt from the handle.
Practical Tips for Disinfecting Cotton Mops

There are several effective ways of disinfecting your cotton mops. We have listed the four best options below. Use whichever method suits you the best.
1. Hot Water
Heat is the best way to kill germs. Disinfection temperature is around 150-175°F (or 70-80°C). Dip your mops in hot water for 5-10 minutes for maximum effectiveness.
2. Vinegar
Dip your mop head in a mixture of one part hot water and one part white vinegar. Let the mop rest in the cleaning solution for 15-30 minutes.
3. Bleach
Lightly spray the bleach onto the mop head. Just enough that you get a slightly damp mop. Let the bleach do its job for at least 5-10 minutes.
Bleach is a strong disinfectant. Avoid breathing in bleach fumes. Always use bleach in a well-ventilated space or outdoors.
4. UV Disinfection
UV light also kills germs. You can either use a strong UV lamp at home, which is inconvenient. Or you can just leave your mop heads to rest in direct sunlight. The UV rays from the sun naturally kill off most bacteria.
How Often Should You Clean Cotton Mop Heads?
There is no fixed period for cleaning your mops. It depends on your cleaning habits, your floor traffic, and the application of the cotton mop.
1. Mop Usage
You can use the chart below to determine your mop cleaning and maintenance schedule.
Table 1 – How to tell when your cotton mop is ready to clean?
| Mopping Application | Light Use | Heavy Use |
|---|---|---|
| Residential | Once a Week | Every Other Day |
| Commercial | Every Two Days | Every Day |
| Hazardous | After Every Use | After Every Use |
2. Visually Dirty Mop Head
You can also do a quick visual check.
Table 2 – Identify the level of mop dirtiness by visual inspection.
| Mop Condition | Cleaning Solution |
|---|---|
| Mop color remains the same after use. | Let it air dry. |
| The mop is starting to discolor. | Rinse until the color is back. |
| The mop is brown and muddy. | Wash your mop head. |
3. Simple Smell Test
Lastly, we have the simplest test. If your mop smells, it’s time to wash it.
Table 3 – Mop wash condition based on smell and color.
| Mop Color | Mop Smell | Solution |
|---|---|---|
| No Change | Faint Smell | Sun or Air Dry |
| No Change | Strong Odor | Spray with Disinfectant |
| Slight Discoloration | Smelly | Thorough Washing |
| Dirty | Smelly | Wash & Disinfect |
| Permanent Discoloration | Smelly | Replace Your Mop Head |
Conclusion
Dirty cotton mops can become a hub of bacteria and disease. Therefore, regular washing and cleaning are a necessary part of mop ownership. Remember to disinfect your mops regularly to prevent mold and odor. Use this guide to properly clean and maintain your mops.
Get Mops & Mop Accessories from Manywell!
We are a leading cleaning supplies company with a proven track record. Manywell specializes in all essential cleaning products, such as microfiber towels, flat mops, and mop accessories.
All our products are fully customizable and come with a satisfaction guarantee. Contact us today to get a Free Customized Quote.


